MICRO I TIMER USED WITH A BADGE TIMER
The MICRO I timer is a really fantastic light weight pinchoff
timer, but it lacks the DT function that is so desirable to use in place of a
fuse. The Badge is a commercial version of the viscous fluid timers that have
become known as Silly Putty timers. It has some drawbacks in that it is
sensitive to temperature changes and can not handle a significant pull on the DT
line .Plus, it does not do the quick DT that is becoming almost a requirement
for many fliers. Dean McGinnes in Florida
showed me how he as combined the two timers to make an effective combination for
1/4 and 1/2A planes. The photos he supplied are pretty self-explanatory, but I
will include comments from him as well as add a few of my own..
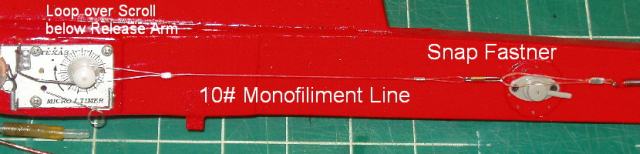
This shows the Badge timer on the right and the Micro I on the left. For quick
DT, a monofilament line is added to the line that normally attaches to the Badge
timer. There is a loop in this extension line and it is placed over the Micro
scroll, immediately below the groove where the engine timing wire rides. The
loop is released from the scroll a a few seconds after the engine shuts down,
thus giving the very useful quick DT. Later photos will show a spring and lever
that is used to minimize the "pull" on this line to keep the load on the Micro
timer as well as the Badge to acceptable levels. Without the lever and dual
springs, this method would not work acceptably.
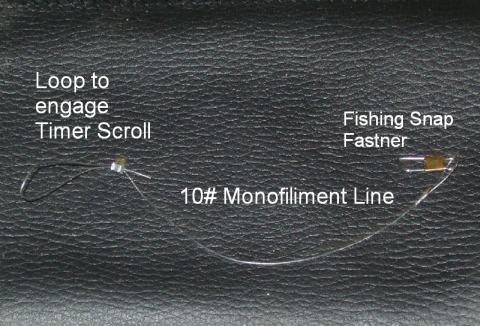
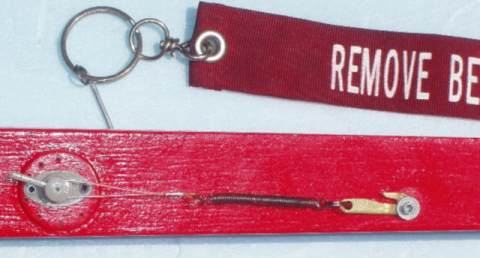
This is a close up of the extension line discussed above. Nothing fancy here,
but you do need to be sure this line can not catch on the Badge when it is
released from the Micro I scroll.. The reason for the monofilament line is so it
will "slip and slide" in the scroll grooves with no appreciable friction or
drag. This is important.
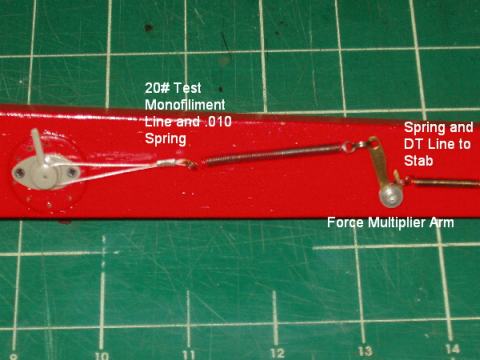
What is important to note here is a weak spring between the Badge and the Force
Multiplier lever, and a much stronger spring in the line that actually holds the
stabilizer down. The lever is a mandatory item as the Badge and Micro I can not
tolerate the line load used to hold the stab down. According to Dean, he made
the spring used between the lever and Badge timer with 0.010 guitar string wound
to about one inch long on a 0.093 mandrel using a K Fags winder. (I use a
variable speed drill with my wife running the drill at a slow creep speed). I do
not know how .010 guitar string compares with the music wire we buy at the hobby
shop. I am sure either will work. The stronger spring (on right of the lever)
is from the hardware store. This is all a balancing act that each person will
need to work out himself. Too much pull on the Badge (or Micro I) and you have a
problem. Too little pull on the stab line, and the stab will not stay down under
power.
Dean has drilled a number of holes in the plywood plate used to mount the Badge.
He then uses a pin with a flag in the appropriate hole to hold the timer off
until time to launch. The flag serves to remind him to pull the pin before
launching. This also shows more detail of the lever.