TEXAS eMAX Electronic Timer
You have seen the rest, now FLY the BEST
Read what Don DeLoach, Editor of the NFFS Free Flight Digest,
has to say about this timer:
"The Texas Timers eMAX is a game-changing timer for Electric FF. It is
ultra-light and slim, run and DT times are easily adjusted in the field, and it
accepts all popular remote DTs as an option. eMAX is certainly the best,
most feature-laden timer currently on the market for AMA E-36, A and B Electric,
and the new Electric NOS."
See videos below
eMAX Basics Video
https://www.youtube.com/watch?v=q3xLlIi4pF8
Understanding the parts in an electric power train video
https://www.youtube.com/watch?v=42HMDAh8plo
Connecting all the power train parts video
https://www.youtube.com/watch?v=amxNysjMZL8
Demo of full power train operation video
https://www.youtube.com/watch?v=oilbN42eP40
Overview
The eMAX timer was developed and designed in conjunction with Dick Ivers, a well known and successful electric flier. Dick has always designed his own timers, and we are fortunate that he agreed to team up with Texas Timers to produce this outstanding product. This is the new benchmark in timers for electric Free Flight.
This timer uses two high quality rotary switches to select the desired motor run time and DT time. The switches have a nice "bump" so you actually feel the setting. The ten different motor run times and 8 different DT timers can be intermixed in any combination to provide 80 unique flight profiles. And, if this is not enough for you, an optional Data Port can be used to set either to any desired value from 0 to 600 seconds in tenths of a second increments. The only restriction is DT time may not be less than the motor time (for obvious reasons) and the timer actually prevents you from doing this. Use of the Data Port requires a PC (using free downloaded software) and a special cable from us. I bought a few ASUS refurbished 7 inch netbooks that work great and am offering them to my customers. Comes with a protective case, and charger. You can keep up with your email and read Kindle books in bed when not using it to program your eMAX. To see what a typical screen looks like when using the Data Port, click HERE. No Apple products are compatible.
All needed motor and DT times to fly E-36, AMA Electric A/B, and all settings needed for the new Electric Nostalgia event in both Cat II and III are included. We also provide short times for trimming and testing as well as short field flying. Nothing has been left out to make all your flying enjoyable. You can see a table of all pre-programmed times by going to the PDF instructions included below. A high quality decal is available to place on the wing, pylon, or fuselage, so you have immediate access to all the information needed. No more guessing if you got the correct number of button pushes or light blinks. We had YOU the user in mind all the time during development.
Should you desire to use RDT, we can provide an optional 6 inch pigtail with a connector that can be plugged directly into our RDT receiver. Yes, the Airtek or Sidus RDT models made for use with a timer may also be connected. Range is reduced a bit when using these other brands of RDT.
The eMAX incorporates a brilliant yellow LED used to show timer status, and in no way is it used to set any times. A slow flash of the LED indicates that power is on. This is an "idle status" indicator. It is very useful for helping avoid leaving the battery connected and possibly ruining the LiPo battery. A rapid flash is used to alert that the timer is "armed" or ready for flight. For ground testing the motor time without running down the battery the motor can be unplugged and the LED is on when the motor is running. It also is on at the times the servo is being moved. Both of these features allow you to test and demo to the official that your times are what they should be. We automatically deduct 0.3 seconds from the true run time from that shown on the setting to allow for the "human delay" in working a watch.
The push button on the front serves to arm the timer and start the motor and timer and it has nothing to do with selecting or setting the times. From the slow flash "idle" a single tap of the button "arms" the timer and the LED begins an easily seen rapid flash. After this, the button must be held in for at least 2 seconds (a safety feature) and then the motor starts running at full speed. You release the button at launch and the timer beings running. Should you change your mind about launching, a single tap of the button with the motor running returns the timer to the "idle" state. No time settings are lost or changed. If you want to change either time setting, this can be done at any time until the motor has started.
We offer all timer models with a Remote Start Switch option that allows a push button to be located at the customers option any place on the fuselage. This permits a javelin type launch that is preferred by some. It performs the identical function to the push button on the timer itself. There is no need to use the board mounted button when launching. The option includes a two pin header mounted on the back of the board and a matching two pin connector with about 6 inches of wire attached. The customer can add as much wire length as desired and supplies his own remote mounted push button of his choosing. Use of the header/connector permits the timer to be removed from the plane without disturbing the remote switch that may be attached permanently to the fuselage.
The timer has an Auto Rudder or Auto Stab optioin that happens at the time the motor is stopped. The servo rotates 45 degrees CW to release any such function, and then returns to the "home" or 0 position. The AR function is now a no cost option. Some customers prefer to not have it. Remember, AR is only allowed in AMA Electric B and F1Q. At the time of DT, the servo rotates 45 degrees CCW to release the DT line and then returns to home. After you have retrieved the plane, it is ready to go again, all prior settings are retained. Or you can instantly make any changes you wish. To see what the servo positions look like, click HERE. While talking about the servo, we also offer two different really nice wire hinges to use on your DT release or for AR and other auto surfaces. See both of them HERE
Removal of the battery does not cause loss or alteration of any time settings, including those made through the Data Port.
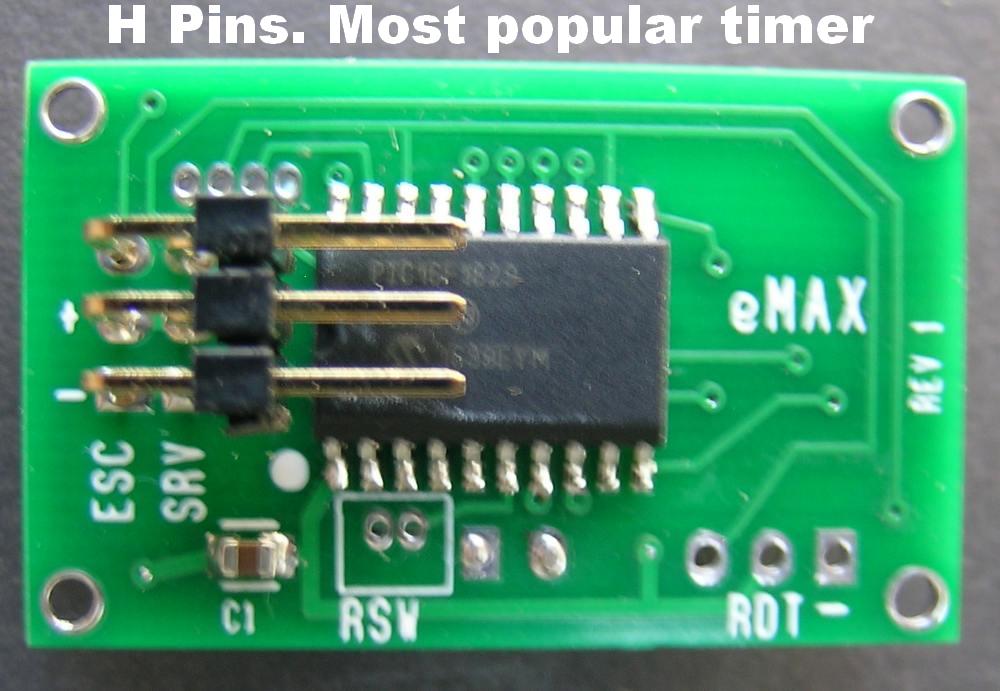
Click HERE to see various photos of the timer with different connectors, RDT pigtail, and the Data Port. A typical board with the new H pin configuration can be seen HERE. See a nice neat installation HERE
The instructions for a PC HERE, and the Quick Start Guide HERE. You can download the PC cable driver used with the Data Port for free HEREThe installation kit now includes a nice laser cut cut cover for the timer. So the full kit has the mounting plate, front cover, and a great decal The earlier hinge is no longer available and the price has been lowered. You can see all these items HERE.
NEW eMAX II Timer model
This represents a significant step in the timer evolution. With the growing popularity in the hotter motors, trimming has become more of a challenge. At the request of many customers, we have changed the way motor run time is set. The eMAX II model now has motor times of 0 to 10 seconds in one second increments. This allows safer trimming and also permits the run time to be adjusted to meet the changing field conditions as set forth by the CD. Every customer who has used it wants nothing else in the future. And, the way RDT is incorporated is altered to again make it better for the more powerful motors. During the motor run, a quick press of the RDT transmitter button stops the motor immediately, but DT is not released. If the button is pressed for over a second, the motor stops immediately, and DT is released 1.3 seconds later. During glide, any press of the button releases DT instantly. We have put the II model in red font in the ordering table below to prevent confusion with the prior timer model. The II is only offered in the most popular H pin configuration. Should the current rules change proposal be approved, the II timer is ready for it. The eMAX II is the same weight, size and layout as the prior model. The price is the same. Scroll down for more information.
There is a rules change proposal in process now that will require the motor runs provided by the eMAX II timer. If it passes, which seems likely, the rules go into effect January 1, 2024.
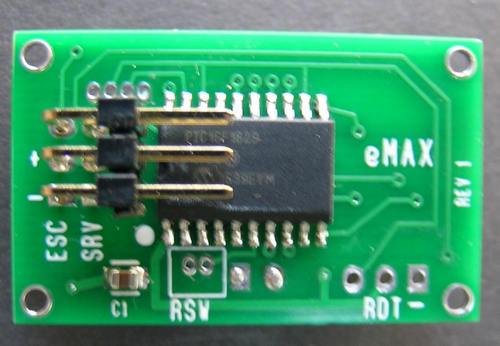
We are seeing many requests for an upgrade of prior/earlier timers to the new eMAX II. We are able to do that at a nominal cost for timers made after early 2017. The best way to check is to count the number of pins on the Micro Controller on the back of the timer. This is the large Integrated Circuit. If it has 20 pins ( ten on a side), the timer does qualify to be upgraded. The timer does need to be working with no changes made to it by the flier.
USING THE DATA PORT?
I prefer using a PC based computer. Since laptops are a bit big to carry to the field, I find the older netbooks to be perfect. In fact, I use a netbook for all the programming of my timers, as well making changes to the functional settings. Netbooks are no longer made, having been replaced with tablets, the only way to obtain one is used from eBay. I was able to find a few netbooks as refurbished with Win XP or 7 in them. These are perfect for use in the field and you can do email from your hotel. The battery may not be like new, but that is fine as you only use the devise for a few minutes to change your time or servo settings. All of them are relatively clean with nothing more than minor blemishes. You can bid on one with eBay, or buy one of my refurbs.
WHAT WIRE GOES WHERE?
I get a lot of calls on how to connect wires to the timer. I hope this bit of explanation will help. There are only two main connections to an eMAX timer, regardless of the pin type configuration. If you look carefully on the circuit board in the area where the ESC and SERVO connector pins are soldered to the board you will see a small (-) and small (+) symbol. The (-) is for the negative or black wires. So, when plugging in the ESC and SERVO connectors, match the black wire with the (-) mark on the board. For pin terminations that are at right angles to the board, the SERVO connector goes on the bottom and the ESC on the top. In addition, the ESC and SERVO connectors have the metal pins inside the plastic housing showing on one side and invisible on the other. The connectors plug in with the side NOT showing the metal pins up or not showing. The black wire will be on the correct side. The red wire is always in the center or (+) pin.
For the ESC the other wires are not so confusing. You have three wires of the same color with the same connector on the ends. The motor also has thee wires of the same color, but likely different) and the same connectors. What wire goes where? There is no way to know. You must connect the three wires any way and see if the motor is spinning in the desired direction. If it is not, you only reverse any two wires, and the rotation direction is now changed. There should be no confusion on connecting the battery wires to the battery. Only remember that you must disconnect the battery to ESC wires when not using it as there is a small but steady power drain that will ruin your LiPo battery if left connected for an extended time.
eMAX Specifications
Weight: 3.3 grams with straight pins, 3.5 grams
with right angle pins.
Size: 1.42" by 0.87" (36mm by 22mm)
Motor times: 2.5 - 30 seconds (with rotary switch, 0 - 600 with Data Port)
DT times: 1.7 - 600 seconds (with rotary switch, 0 - 600 with Data Port)
Ordering
To order Motors, Props, Hubs, ESCs, Batteries, and Servos, click HERE
The eMAX, Timer Options, Hinges, Servo Wheels, Decals, and install kits are ordered below
* The MF model has four servo timed functions and comes with an Energy Limiter Port which is now required for the F1Q Event. A Data Cable is required to use the timed servo functions but is not required for using the EL. The H pin configuration is the only way the MF is supplied, now. This is the top timer for use in F1Q. Physical size and mounting is the same as all other eMAX series timers. Call for any questions. 423 282 6423
Take a close look at the H pin configuration. 99% of my customers prefer it and I normally have finished stock. The H is the thinnest and narrowest timer I have. Click HERE for a photo.